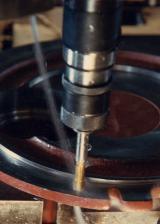
Applying plating to fasteners necessarily alters gages, pitch diameters, and other characteristics. Manufacturers must consider and make allowances for these changes in order to maintain the class of fit the application calls for and the customer desires. Tap selection becomes the crucial element in creating internal threads that meet the required tolerances. Neglecting to account for the alterations plating will bring about on internal threads can result in failed inspections, customer rejection, and lost profits.
The first step towards compensating for the effects of plating is to determine exactly how and by how much the plating will change the threads’ dimensions. For instance, for the commonly specified 60-degree thread, the plating on the threads will decrease the pitch diameter of internal threads by four times its thickness (double the plate thickness on both sides of the threads) when it is applied properly and uniformly. This 4:1 ratio becomes even more pronounced as the thread angle decreases; 8:1 on 29-degree Acme threads; 23:1 on 10-degree square-threaded nuts.
The easiest and most common solution to a coating’s effect on internal threads’ pitch diameter is to start with a slightly larger P.D., so that applying the coating will reduce the diameter by the correct amount to make the finished product fall within class-of-fit specifications. Using oversize or higher H-limit taps will create the wider diameter pitch called for in the calculations. As a rule of thumb, increase the standard tap one “H” number for every .125 mil (3.2 micron) of plating thickness. To compensate to the correct “pre-plating” internal thread dimensions to be tapped, add the maximum “plating adjustment” (4:1 for 60-degree threads) to the minimum allowable pitch diameter. Then add the minimum plating adjustment to the maximum acceptable pitch diameter.
